


Table of Contents

Many people exhaust their energy, time, and money during the holiday season. Making DIY Christmas signs is a great way to spend time with your family, save money, and have fun while you’re at it. If you are looking to make your own Christmas sign but don’t know where to begin, this blog post will equip you with the knowledge to create a beautiful holiday decoration.
Key Takeaways
- Start your DIY project by looking for inspiration from previous designs you can find online;
- You can make your own DIY Christmas sign with several materials including plastic, metal, and wood;
- Keep the placement of your design in mind. Ask yourself if you plan to place it outside or indoors.
- The material and placement will also determine your artistic limits. Will you use paint, markers, or crayons to create your design? If you’re placing your sign outside, it’s best not to add small trinkets like buttons and beads;
- Incorporate a hands-on arts and crafts approach with help from digital printing platforms.
DIY Christmas Sign Examples
To help you get your creative juices flowing, here are ten projects you can consider making. But don’t let this short list limit you! You can make something entirely unique by mixing and matching DIY Christmas sign ideas below.
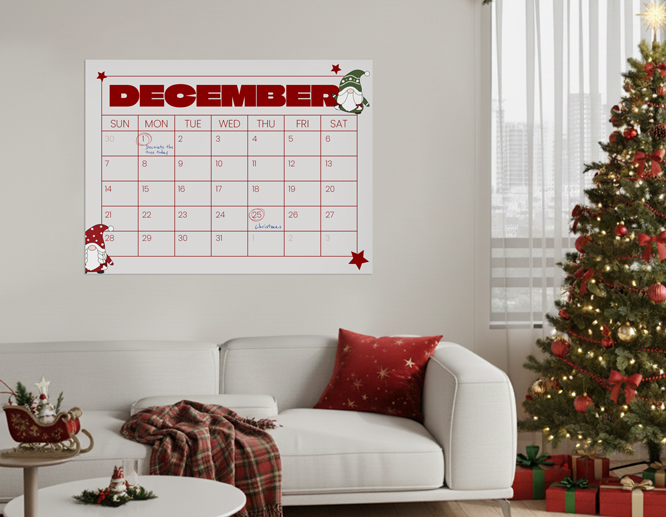
Christmas Countdown
This can be something as simple as a calendar, but if you’re in the mood to be more playful, you can make it more interactive. You can create a Christmas countdown with postcards, sticky notes, or even stickers. Another thing you can do is create a makeshift Advent calendar on foam board, especially since many sell out in stores so quickly. This is a good DIY Christmas sign idea, especially fun for younger children, who get more excited by the day.
Modern Christmas Wood Sign
Wooden signs go hand in hand with the Christmas season. It brings a timeless aesthetic that adds to the winter vibe so many love and cherish. Like many of these examples, a DIY “Merry Christmas” wood sign can be as simple or as elegant as you want it to be.

Merry Christmas Signs
A handmade DIY “Merry Christmas” sign can go a long way. The message itself is well-received this time of year and can be placed on just about any type of material. You can add your message on paper, plastic, metal, and, as mentioned above, wood.
Snowman Sign
The Snowman is a universal symbol for Christmas and the winter season. What’s great about this symbol is that you can use it both for Christmas and to welcome the snow-filled season. The anthropomorphic Snowman is a magical announcement that winter has arrived. Their design can be found above your fireplace, in your classroom, or on your front porch.

Directional Christmas Signage
Do you need to provide directions for your retail store or another area with heavy foot traffic and make it feel festive? This is your chance to do both. Directional signage is an excellent DIY Christmas sign idea and provides a practical way to get people in the festive mood while keeping things simple, informative, and fun.
Reclaimed Wood Sign
Including reclaimed wood in your DIY project is both sustainable and gives you more creative freedom than standard wooden signs. The fact that you can use various shapes from reclaimed wood allows you to make something that is one-of-a-kind.
Joy Sign
A standard Joy sign is a wonderful and simple way to usher in holiday cheer. It brings in feelings of calm, welcome, and warmth. In other words, it makes everyone who sees it feel good about themselves and their surroundings.
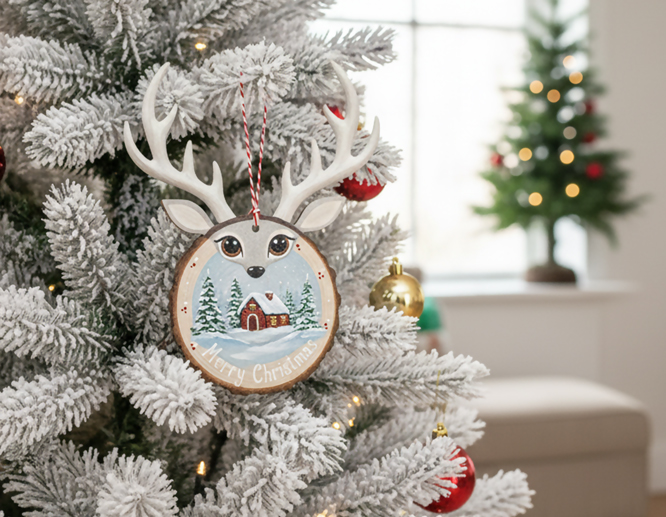
Wood Slice Sign
Wood slice signs are also unique and cozy, but more recognizable than reclaimed wood. It gives onlookers the sense that you made it yourself. While you may not have cut out the wood yourself, you definitely have the freedom to make the artwork that’s featured on top!
Merry Porch Signs
Greet both your expected guests and unexpected carolers with a merry porch sign. It’s a friendly addition to your home that will make others feel comfortable and welcomed.
Wooden Christmas Tree
While Christmas trees are a staple Christmas decoration in most homes, their shape alone is universally recognized. You can display wooden Christmas trees almost anywhere: in your living room, outside on your porch, in a classroom, and even in your car.
DIY Christmas Signs Placement
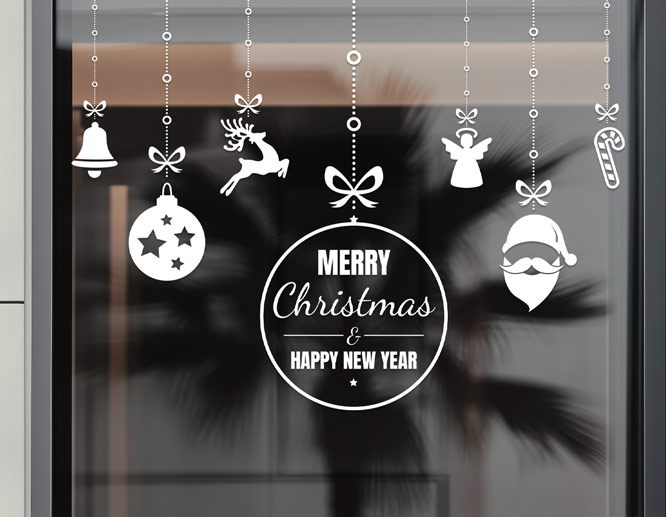
You’re going to want to consider the time and placement of your new design. In addition to placing one on your front porch or inside your living room, you can also make DIY xmas signs with window decals for your car or home. If you want to add a little more fun to your holiday party, hand out stickers to your guests. Speaking of holiday parties, let attendees know which house is yours with a custom pole flag that displays a special holiday greeting. Last but not least, you cannot go wrong with custom wooden prints.
How to Make DIY Christmas Signs
If this is your first attempt at making a DIY Christmas sign, you’ll want to follow some basic guidelines. These will help make your project smooth and easy-going.
Choose the Right Base Material
First, you will need to decide which material you want your DIY Christmas sign to be made with. Will it be wood, metal, glass, or plastic? You should choose the base material based on the type of aesthetic you want to give off. If you’re going for cozy, then a wooden sign is a good start. If you want something more vibrant, then metal or plastic are a solid choice. At Square Signs, we have a wide collection of metal, plastic, and wooden signs. The base material you choose will also influence your choice of supplies.
Gather Supplies
Since this is a DIY project, you have the freedom to choose whether or not you want to collect materials around your house or pick up extra supplies at a crafts store. Common supplies for holiday DIY sign projects include: glue, paper, pencils, pens, scissors, tape, markers, glitter, beads, buttons, paint, and brushes. The amount and types of supplies you use all depend on how creative, innovative, and resourceful you want to be.
Design Your Sign
Figure out what kind of message you want to convey, and what colors work best with your base and supplies. Once you do, you can start designing. Remember: this is a DIY project, you should embrace your imperfections to shape your own unique design.
Prepare and Paint the Surface
If you are going to paint the surface of your holiday DIY sign, you will first need to make necessary preparations. Whether you are painting on a metal, plastic, or wooden sign, you will want to clean and sand the surface first. Then you’ll want to add a primer to coat the surface and wait for it to dry before you begin painting.

Decorate and Personalize
Now you are ready to personalize your DIY Christmas sign by placing it wherever you think is necessary.
Tips to Create Quality DIY Christmas Signs
Making your own DIY Christmas signs may sound like a daunting task, but if you’re prepared and willing, you’ll find the process and the result extremely satisfying. However, before you dive into the task that awaits, we’ve prepared a few tips to help you make your journey as smooth as possible.
Keep the Sign Simple
Although you are free to choose how elaborate you want your design to be, if you keep it simple, you will save time, money, and a possible headache. Keeping your DIY xmas sign simple is also more fun for younger children, who may get flustered if it takes too much time or has too many small pieces.
Look for Inspiration
Browse websites such as Pinterest or Instagram. Take a stroll through your favorite neighborhood that has your favorite Christmas decorations. You can find inspiration just about anywhere.
Think of Design and Print Platforms
Need more inspiration? You can also incorporate graphic design with arts and crafts. If you have a knack for graphic design, you can supplement your DIY project with a digital element. Our free and intuitive design tool offers several holiday-themed, ready-made templates for you to choose from.
Need a ready-made Christmas sign if you’re running short on time? We have you covered!