


FREE SHIPPING ON ORDERS OVER $99
Eligible for ground shipping within the contiguous US. Excludes products over 36” and freight shipping.
10% OFF YOUR FIRST ORDER


Why Dibond Signs?
- Durable and weatherproof with a strong aluminum core;
- Lightweight and rigid for easy mounting;
- Custom shapes: square, rounded, outline, or overline;
- Single or double-sided printing;
- White or brushed silver finishes;
- Ideal for promotional, decorative, or directional use.
Dibond Signs
Best Seller
Give your enterprise an innovative touch with solid composite aluminum displays that weigh less than your standard aluminum products.
Read More
Why Dibond Signs?
- Durable and weatherproof with a strong aluminum core;
- Lightweight and rigid for easy mounting;
- Custom shapes: square, rounded, outline, or overline;
- Single or double-sided printing;
- White or brushed silver finishes;
- Ideal for promotional, decorative, or directional use.

What are Dibond Signs?
Dibond signs, also known as composite aluminum signs (ACM signs), are among the toughest and most resilient metal signs available. They’re versatile and durable, making them suitable for a wide range of applications.
Dibond signs can be used to create anything from business advertising and regulatory street displays to appealing wall art pieces for exhibitions. Harnessing the strength of two robust metal layers on either side of a sturdy plastic core, Dibond signs are reliable and cost-effective choices to promote businesses of all sizes.
They’re light, bend-resistant, and long-lasting, withstanding harsh weather with minimal to no damage.
Looking for an effective way to promote your company? With our Dibond printing solutions, you can order a fully customized product that fits your business needs. Check our aluminum signs if you need a display made of a single solid sheet.
Features
- Weatherproof Construction: Dibond is made of a solid aluminum face and polyethylene core for long-lasting durability in any environment;
- Rigid and Lightweight: The product combines metal strength with easy handling, ideal for mounting or hanging without heavy-duty support;
- Vibrant UV-Printed Graphics: Images are printed directly onto the surface using UV-cured inks for rich colors and fade-resistance;
- Professional Appearance: It comes in sleek standard white or brushed silver colors, great for both indoor and outdoor displays;
- Custom Sizes and Shapes: You can choose from standard, rounded shapes, or custom cuts with or without borders to fit your branding needs;
- Single- or Double-Sided Printing Options: Customize your signage to be visible from one or both sides, depending on your display setup;
- Easy Installation: Install using standoffs, screws, command strips, or adhesives, depending on your surface and setting.

Dibond Sign Printing
A composite aluminum sign is a rigid product that is resistant to rusting and warping. Lighter than pure aluminum, a Dibond sign comes with two thin, solid aluminum panels on either side of a polyethylene core.
The front and back surfaces can have a white or brushed silver coating. This composite sign board withstands weather conditions such as snow, rain, and heat.
We use direct full-color UV printing for our Dibond signs. Inks are applied and dried with UV rays, creating sun-resistant graphics. We offer single-sided and double-sided printing options for Dibond signage.
- Single-Sided: Graphics are printed on the front, ideal for wall-mounted ACM signs where only one side is visible.
- Double-Sided: Images are printed on both sides to maximize visibility, perfect for free-standing or hanging signs that need to be seen from multiple directions.
Popular Sizes of Custom Dibond Signs
- 12” x 18”: This size creates compact and versatile products, great for directional signs, door displays, or small business branding;
- 18” x 24”: It’s ideal for real estate signage, wall-mounted branding, and informational plaques;
- 24” x 36”: This is a popular mid-size option for storefront displays, safety signage, or promotional graphics;
- 36” x 48”: The size is perfect for high-visibility outdoor signage, construction sites, or building-mounted branding;
- 48” x 96”: It’s an oversized format, best suited for large-scale advertising and exterior building signage.
Shapes of Custom Dibond Signs
We use CNC cutting routers to create your custom Dibond signage. The machines ensure pinpoint accuracy. This allows us to cut composite aluminum signs into the exact shapes you desire.
*Please note that we don’t provide cut-out options for this product.
- Standard: Clean-cut square or rectangular shapes with pointed 90° corners are ideal for straightforward messaging and classic display needs. Handle with care during installation;
- Rounded: This option provides square or rectangular signs with softened, rounded corners for a polished finish. It’s perfect for indoor displays;
- Custom Cut: Your sign is cut to match the exact contour of your design, allowing for bold, custom-shaped signage that grabs attention;
- Custom Cut with Border: Features an outline cut with an added border around the design, great for emphasizing logos or illustrations with contrast and definition.
Specifications
| Material | Polyethylene core sandwiched between two thin aluminum sheets |
|---|---|
| Features | Smooth, sun and deformation-resistant, substitute for standard aluminum |
| Thickness | 0.125” (3mm), 0.25” (6mm) |
| Installation | Standoffs, suction cup & hook, command strips, zip ties, easel backs |
| Weight | 0.765 lbs/ft², 1.53 lbs/ft² |
| Printing | Digital, high-resolution, full-color with UV inks, single or double-sided |
| Color | Standard white, brushed silver |
| Size Range | 4" × 4" to 120" × 60" |
| Lifespan (Indoors/Outdoors) | 10+ years / 5+ years |
Common Uses of Dibond Signs
Dibond Logo Signs
Composite aluminum signs will help you amplify your brand voice with an elegantly printed trademark. Create your Dibond sign for exterior or interior showcasing. Choose its form, customize it to match your vision, and order it within a couple of minutes. The sturdy, smooth-looking ACM sign will provide your office with a professional look.

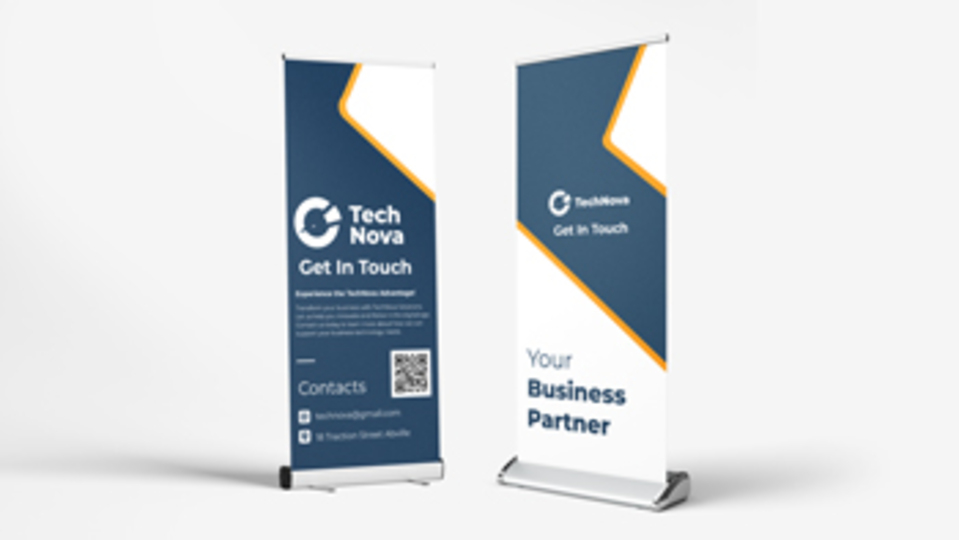
Promotional Dibond Signs
Do you need an innovative touch to improve your business voice? Rest assured that Dibond signage can make it happen. To generate more walk-ins, consider new, unique designs and graphics for your Dibond signs to make them catchier. Thanks to their impressive sturdiness and premium quality, the laser-cut Dibond signs are used under different weather conditions.

Dibond Name Plates
Elegance and professionalism are key for enterprises. Employees’ work attire, office desks, and smooth office walls can all look even better if you add some attractive name plates. Custom aluminium composite signs are your go-to solution in this case. Order small composite name plates with personalized graphics.

Directional Dibond Signs
Aluminum composite signs, just like custom acrylic signs, are the lead products here. Since wayfinding systems are designed for exterior and interior use, Dibond aluminum signs match all needs, guaranteeing a smooth look and high endurance.

Regulatory Dibond Signs
Dibond signs have been predominantly used as traffic, safety, and other road-related displays. The necessity of safety guides and traffic-regulating displays never dwindles. So create yours from Alu-Dibond prints and use them for the upcoming five years and more.
Decorative Dibond Printing

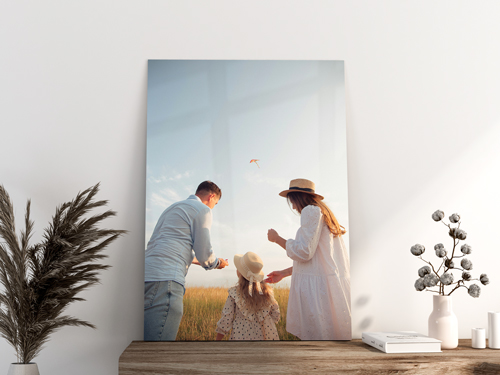
Dibond Photo Printing
Are you organizing an exhibition for your own artwork? You can think of Dibond photo printing as a fresh suggestion for this event. Available in various forms, you can get them fully colored with your artwork and set them up as free-standing displays on any flat surface or mount them onto the walls. Either variant will accentuate the vividness of the Dibond photo printing.

Installation of Custom Dibond Signs
-
Standoffs: The most popular method for wall-mounting Dibond signs. Includes bolts that create a modern, professional look by spacing the sign slightly off the wall.
*Select drilled holes and stand-off options in the design tool before placing your order. - Easel Backs: Ideal for tabletop displays or free-standing photo prints. Great for receptions, exhibits, or interior signage.
- Zip Ties: A quick and secure method for mounting signs to wire fences, perfect for outdoor warnings or temporary displays.
- Command Strips: A no-drill, adhesive solution for indoor use. Clean and damage-free, ideal for smooth walls and short-term signage.
- Suction Cup & Hook: Best for double-sided Dibond signs placed on glass surfaces like doors and windows. Comes with predrilled holes and all required accessories.
How to Care for ACM Signs
Dibond signs require gentle, regular care and proper storage. To prevent dirt buildup, clean your plaques with mild dish soap and lukewarm water. Use a soft, non-abrasive cloth or sponge to clean the surface. Rinse it clean and wipe it dry with an absorbent towel.
Don’t use harsh chemicals and alcohol-based cleaners, as they will wipe off the printing and damage your metal.
Remove grime and spot debris with soft brushes and mild detergent solutions.
Proper storage guarantees the product’s longevity. Store your display flat in a cool, dry area, away from direct sunlight and moisture. Don’t place other items on top of the Dibond sign.
Get Durable, Professional Dibond Signs for Any Setting
Create high-impact signage that lasts with custom Dibond signs. Known for their rigid aluminum surface and weather-resistant core, these signs are perfect for business displays, real estate, directional signage, and more.
Design your Dibond sign online using our intuitive tool, browse free templates, or upload your own artwork. Order today for fast shipping across the US and Canada!
Products Related to Dibond Signs


Dibond Signs FAQ
What is a dibond sign?
A Dibond sign is a rigid product with two metal faces and a plastic core. It’s stronger and lighter than standard aluminum.
What material do you use for Dibond printing?
Our Dibond signs are highly durable products made of a polyethylene core sandwiched between two thin, sturdy aluminum sheets.
How much does the sign weigh?
A Dibond sign weighs 0.765 lbs/ft² or 1.53 lbs/ft², depending on its thickness.
What thickness options do you offer for Dibond metal signs?
Our Dibond signs are available in 0.125” (3mm) and 0.25” (6mm) thicknesses.
What shapes can I have my composite aluminum signs printed?
You can get your sign designed in standard (square/rectangular), rounded, and circular/oval shapes or custom cuts with or without borders.
Can I get a double-sided ACM sign?
Yes, you can get a double-sided Dibond sign. You can have the same or different graphics printed on its faces.
Are aluminum composite signs suitable for indoor use?
Yes, they’re perfect for indoor use.
Is Dibond resistant to harsh weather conditions?
Dibond signs are highly durable and sturdy, which means they withstand heavy precipitation and fluctuating weather conditions. However, don’t install your product in scorching sunrays if you want to save your printing from early fading.
Is the product rustproof?
Yes, this product is rust-proof since it does not contain any iron. However, the metal forms a protective layer of aluminum oxide when exposed to air, making it highly resistant to corrosion in both indoor and outdoor environments.
Is Dibond fireproof?
Dibond is not a fireproof material. The material is considered heat-resistant. It works fine in temperatures up to a maximum of 176°F (80°C).
Exposure to an open flame or direct contact with fire may cause the core to melt, and the aluminum faces to warp.
Do you offer lamination for ACM signs?
Yes, we provide matte, glossy, and anti-graffiti lamination options for Dibond printing. The first two options provide a polished finish and prolong the life of your sign. Anti-graffiti allows you to clean the sign more easily without worrying about the print.
What are the most common uses of the product?
Dibond signs are a perfect advertising tool for different businesses and industries. They’re good for restaurants, retail storefronts, corporate offices, and industrial sites.
Printed dibond signs are an ideal choice for real estate displays, parking signs, wayfinding, regulatory, and informational plaques.
Can I upload my own design?
Yes, you can upload your own design to our design platform and restyle it to your liking, using our big library of fonts, icons, illustrations, and other elements.
What mounting options are available, and which one should I choose?
We provide standoffs, easel backs, zip ties, command strips, and suction cups & hooks to install Dibond signs.
Choose the accessories that best match your installation method. Standoffs, zip ties, and command strips facilitate wall-mounting.
Easel backs allow for freestanding displays, while suction cups & hooks are for hanging custom Dibond signs on glass surfaces.
How long can I use my Dibond signs?
Dibond signs are generally sturdy products that can be used outdoors like corrugated plastic signs, but their lifespan differs based on the installation area. They usually last over five years outdoors and ten years indoors.
How do I care for my Dibond sign?
Wipe your Dibond sign regularly with a cotton towel and lukewarm water. Please note that any acid or alcohol-based liquid will wipe the printing off and damage the Dibond plaque.
How do I install my Dibond signs?
We provide several ways to set up Dibond signs. Mount them onto walls or keep them free-standing on flat areas such as tables, mantels, and countertops with the necessary accessories.
Is Dibond the same as aluminum?
Dibond is not the same as aluminum. While the printed surface is essentially the same, Dibond has a plastic core under the metal surfaces. Check our article to learn more about the differences between Dibond and aluminum signs.
Do magnets stick to the Dibond?
No, magnets will not stick to Dibond. Given that aluminum is not a magnetic substance, and both surfaces of a Dibond sign are made of aluminum and the core is made of plastic, no element of a Dibond sign is magnetic.
Quality
Value for money
Reviewer Photos


I had an outstanding experience with Square Signs, and I especially want to recognize Melanie for her exceptional customer service. From the very beginning, Melanie was professional, patient, courteous, and incredibly helpful. She took the time to answer all of my questions, guide me through the design process, and ensure that every specification was exactly as I wanted it. Her attention to detail and willingness to help gave me confidence that my project was in good hands. I was creating a custom sign for my husband's gazebo where he spends most of his time having whiskey and a cigar, and Melanie worked with me every step of the way to make sure the artwork, materials, sizing, and finishing details were correct. She was responsive, understanding, and genuinely invested in helping me create the best design. When the sign arrived, it exceeded my expectations. The quality was outstanding, the colors were beautiful, and the finished product looked absolutely gorgeous. My husband loved it and put it up immediately. Not only was the customer service exceptional, but the pricing was also amazing. I received a high-quality custom sign at a very reasonable cost, and the entire process was smooth and stress-free. Other companies were charging more than 3x more plus a design fee. Thank you, Melanie, and thank you, Square Signs, for providing such a wonderful experience. I would highly recommend Square Signs to anyone looking for quality products, excellent pricing, and customer service that truly goes above and beyond.
The sign looks great and was delivered quickly.
Great looking product for the price
Great quality for the price. Cheaper (including shipping) than local shops. Shipped well protected and looks great.
GREAT PRODUCT, ON TIME, PERFECT
Thank you for the spectacular review. We appreciate it!
Sign came out fabulous! Great price and easy to use website to order. Staff worked with me to make sure everything was perfect with the proof and were exceptional.
We appreciate you taking the time to leave us this great review. We're glad to hear that you had a great experience with us and that you loved the sign.
customer service is fast and very helpful, the signs are nice quality for an affordable price, with a quick turnaround. Would recommend.
Thank you for the awesome feedback. We're glad you loved the sign, and we truly appreciate your recommendation.
Sign was exactly as ordered, but I was not expecting an unlaminated sign's paint to come off so easily. It wipes off with water. I am reordering the the "matte" laminate and hoping this will work for outdoors
Thanks for your feedback, and we’re glad the sign arrived as expected. Unlaminated signs aren’t designed to be written on or cleaned with water. Using pencils and erasers can wear down the surface, making the ink more sensitive to moisture. For outdoor use, the print itself is suitable, but lamination helps protect against wear and fading over time. Matte lamination adds protection, but for surfaces that need cleaning or writing, anti-graffiti options are more appropriate. We appreciate your order and your understanding.
Easy purchase process. Great customer service in response to a question. Delivered ahead of schedule.
Thank you for the great feedback. We're happy to hear that you had such a positive experience with us and that your sign arrived early. We look forward to your next order.
Wish it was glossy

We appreciate your feedback. We are glad to hear that the product itself met your expectations. As for the finish being matte, we do offer a glossy lamination option that our customers can select.
Dibond Sign Templates