


FREE SHIPPING ON ORDERS OVER $99
Eligible for ground shipping within the contiguous US. Excludes products over 36” and freight shipping.
10% OFF YOUR FIRST ORDER


Why Car Decals?
- Use code WHEELIN15 to get 15% off car decals. Valid through September 30, 2026.
- Waterproof and weather- and UV-resistant decals.
- UV-resistant printing with fade-proof inks.
- Easy, peel-and-stick tool-free application.
- No residues after removal.
- Custom-cut designs, sizes, and styles.
- Available in matte and glossy finishes.
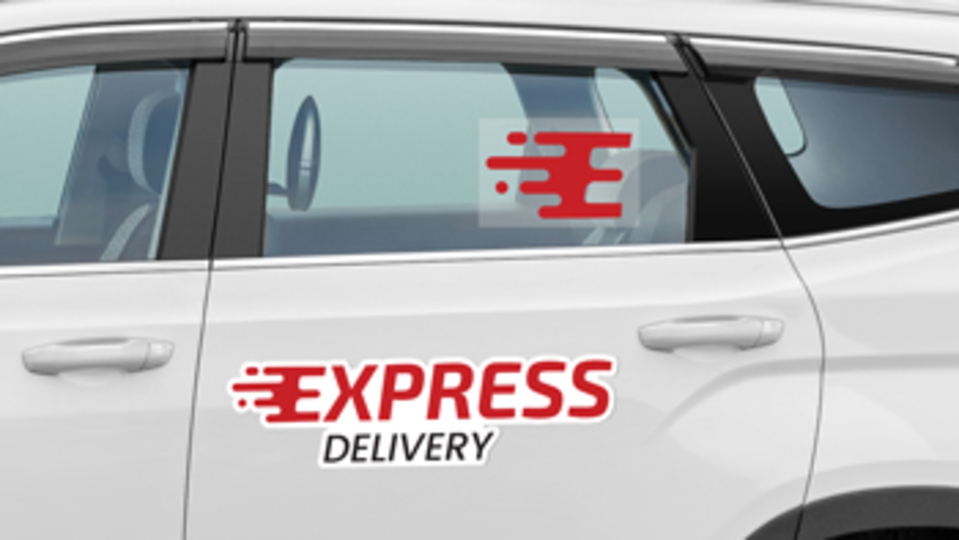
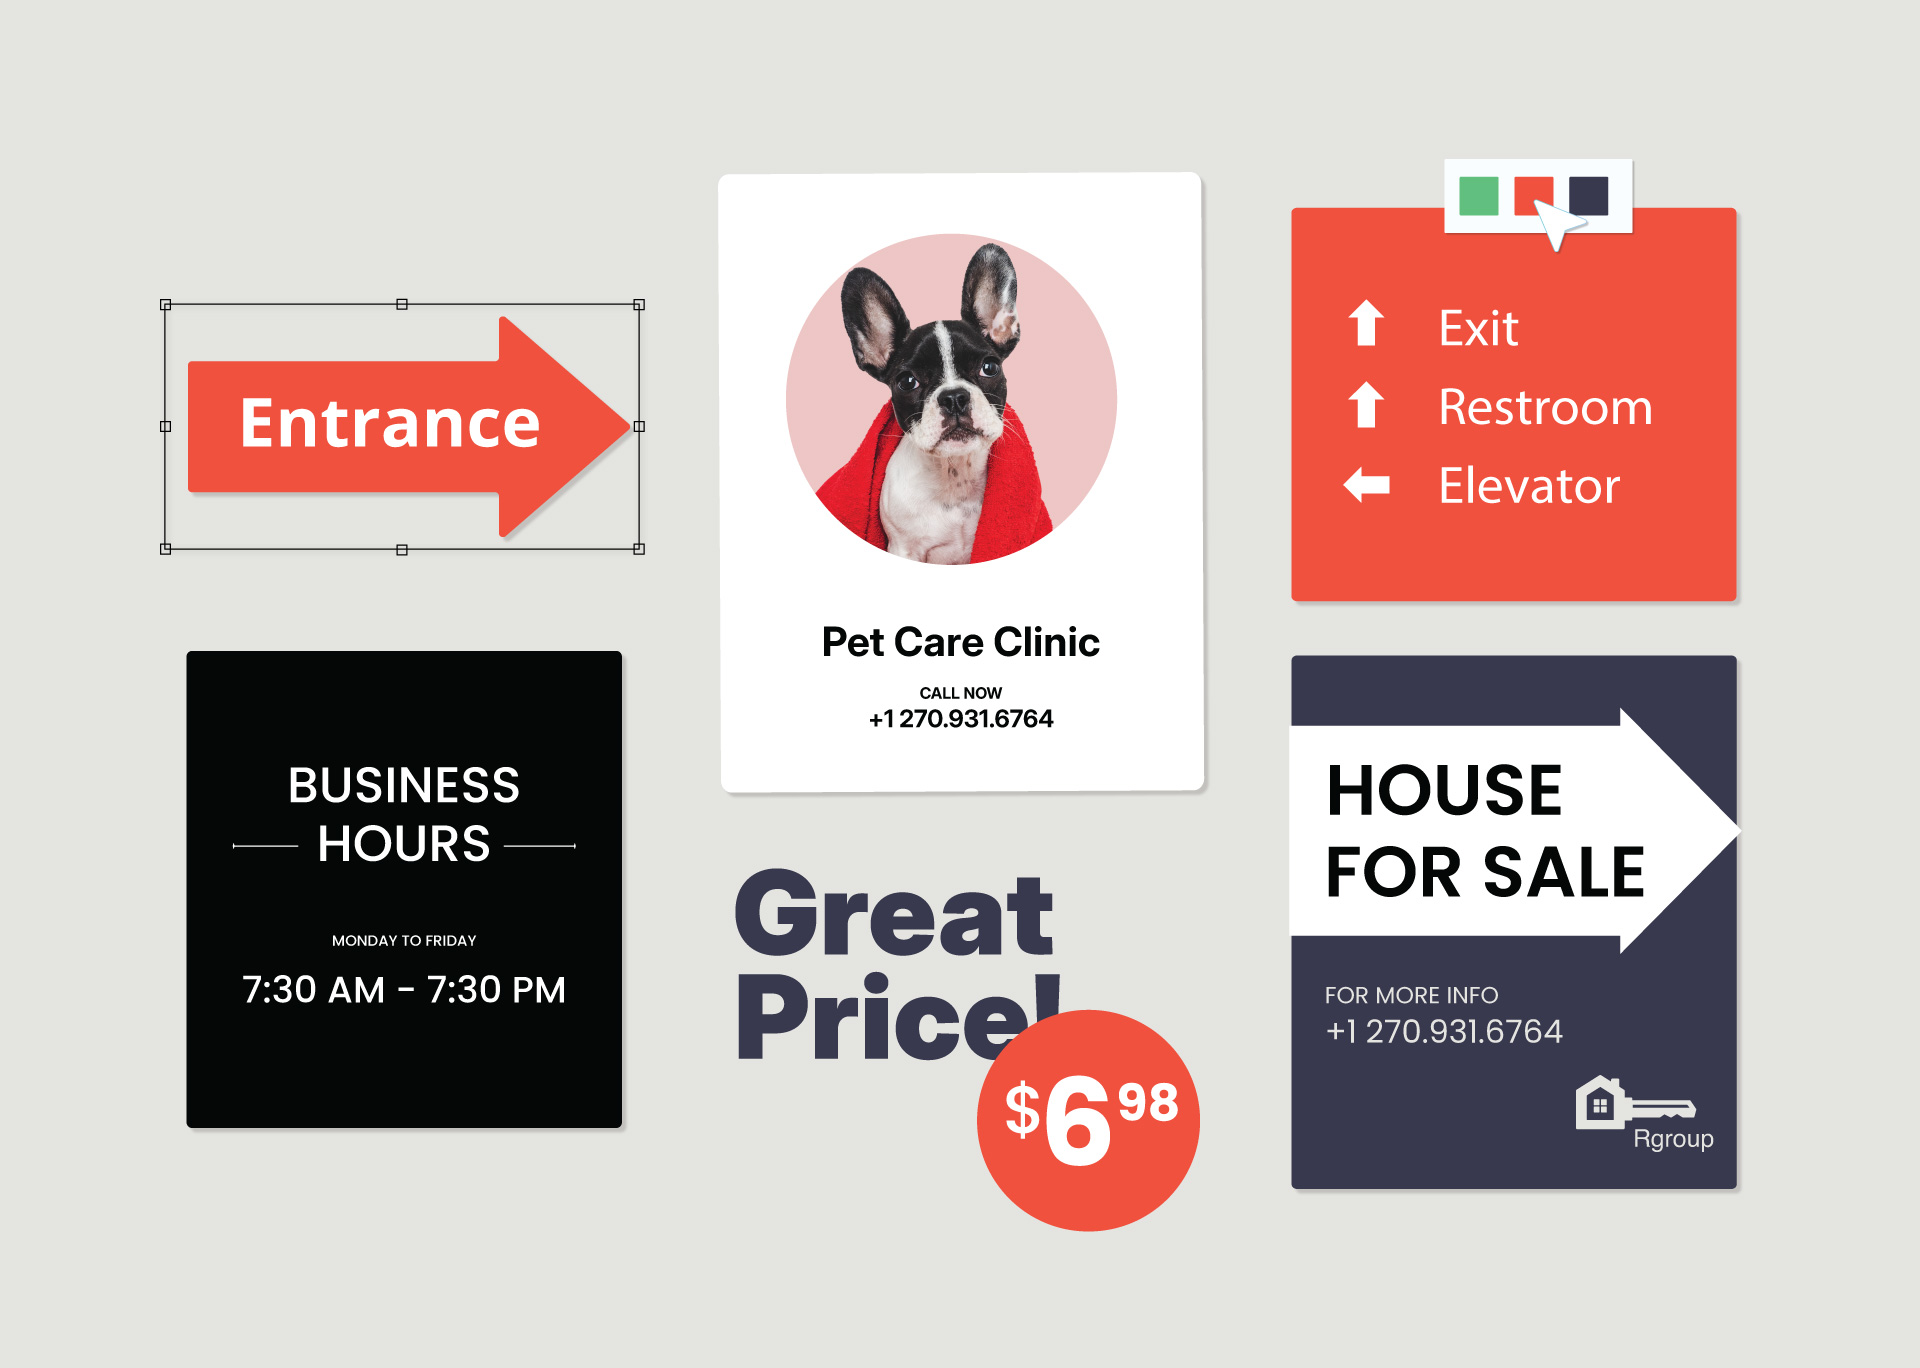
Car Decals & Vehicle Graphics
Affordable, vibrant and effective tool for promoting your business on the go. Turn your car into an advertisement machine.
Read More
Why Car Decals?
- Use code WHEELIN15 to get 15% off car decals. Valid through September 30, 2026.
- Waterproof and weather- and UV-resistant decals.
- UV-resistant printing with fade-proof inks.
- Easy, peel-and-stick tool-free application.
- No residues after removal.
- Custom-cut designs, sizes, and styles.
- Available in matte and glossy finishes.

What are Custom Car Decals
These versatile graphics can cover your vehicle doors, bumpers, and even glass surfaces and can be applied to sedans, vans, trucks, and trailers. With custom designs and professional-quality printing, your vehicle becomes a powerful marketing tool that reaches potential customers throughout your community. Whether you need a decal for your car window, we’ve got you covered.
Car Decal Printing
Application Options: Standard vs. Inside-Glass
- Standard: Applied directly to the outer surface of the vehicle. Choose this option for maximum visibility and bold impact. Perfect for body panels, doors, bumpers, and exterior branding. This is the default method for all car decal types.
- Inside-Glass: Mirror-printed on the adhesive side and applied from the inside of the glass. Choose this option for added protection and longevity. Ideal for clear car decals,this method shields your graphics from weather, fading, and scratches. Use them for window displays and contact information.
Types of Vehicle Decals
- Clear: This transparent material is ideal for glass surfaces. Use clear car decals for inside-glass installation on windows. It’s also a great option when you want to comply with visibility regulations.
- Non-Transparent: Opaque car decals come with strong adhesion and are suitable for any part of the vehicle. Display them to feature bold graphics on the go.
- One-Way Visibility: Perforated car window decals allow you to see out while blocking the view in. Use them for branded window decals that ensure privacy.
Shape Options for Custom Car Decals
Get decals for cars with custom shapes, specifically cut for your needs. Our digital plotter machine uses blades to cut designs with pinpoint accuracy. Here's how we can cut your car decals:
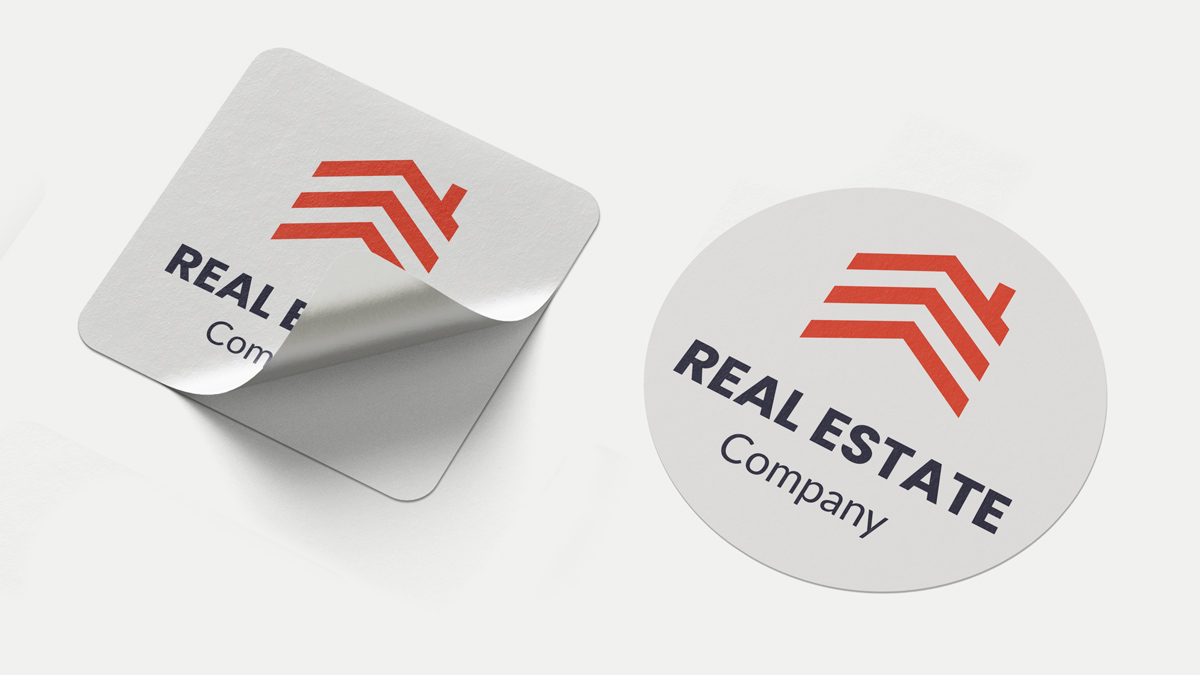
- Square / Rectangle: This is a classic cut offering pointed corners. This shape works great for logos, text blocks, or straightforward car door decals.
- Rounded: Think square or rectangle, but with rounded corners that result in a smoother appearance.
- Outline: We trim your decal to follow the exact shape of your design. There are no backgrounds or borders. Perfect when you want a custom silhouette.
- Overline: Your design gets cut to shape, but with a thin border around the edge. This creates a sharp contrast and makes your graphics pop.
Specifications
| Thicknesses | 4 mil (clear, opaque), 6.3 mil (perforated) |
|---|---|
| Material Finishes | Clear, opaque, perforated |
| Min Size | 6”x6” |
| Max Size | 58”x1,680” (clear, opaque), 52”x1,680” (perforated) |
| Application Options | Standard, inside glass |
| Cutting Options | Standard, outline, overline, rounded |
| Common Sizes | 6”x12”, 12”x18”, 18”x24”, 36”x42”, 36”x36”, 48”x72”, 48”x96”, custom |
| Installation Accessories | Squeegee |
| Shapes | Square, rectangular, round, custom |
| Lifespan | 1+ years |
Common Uses of Vehicle Decals
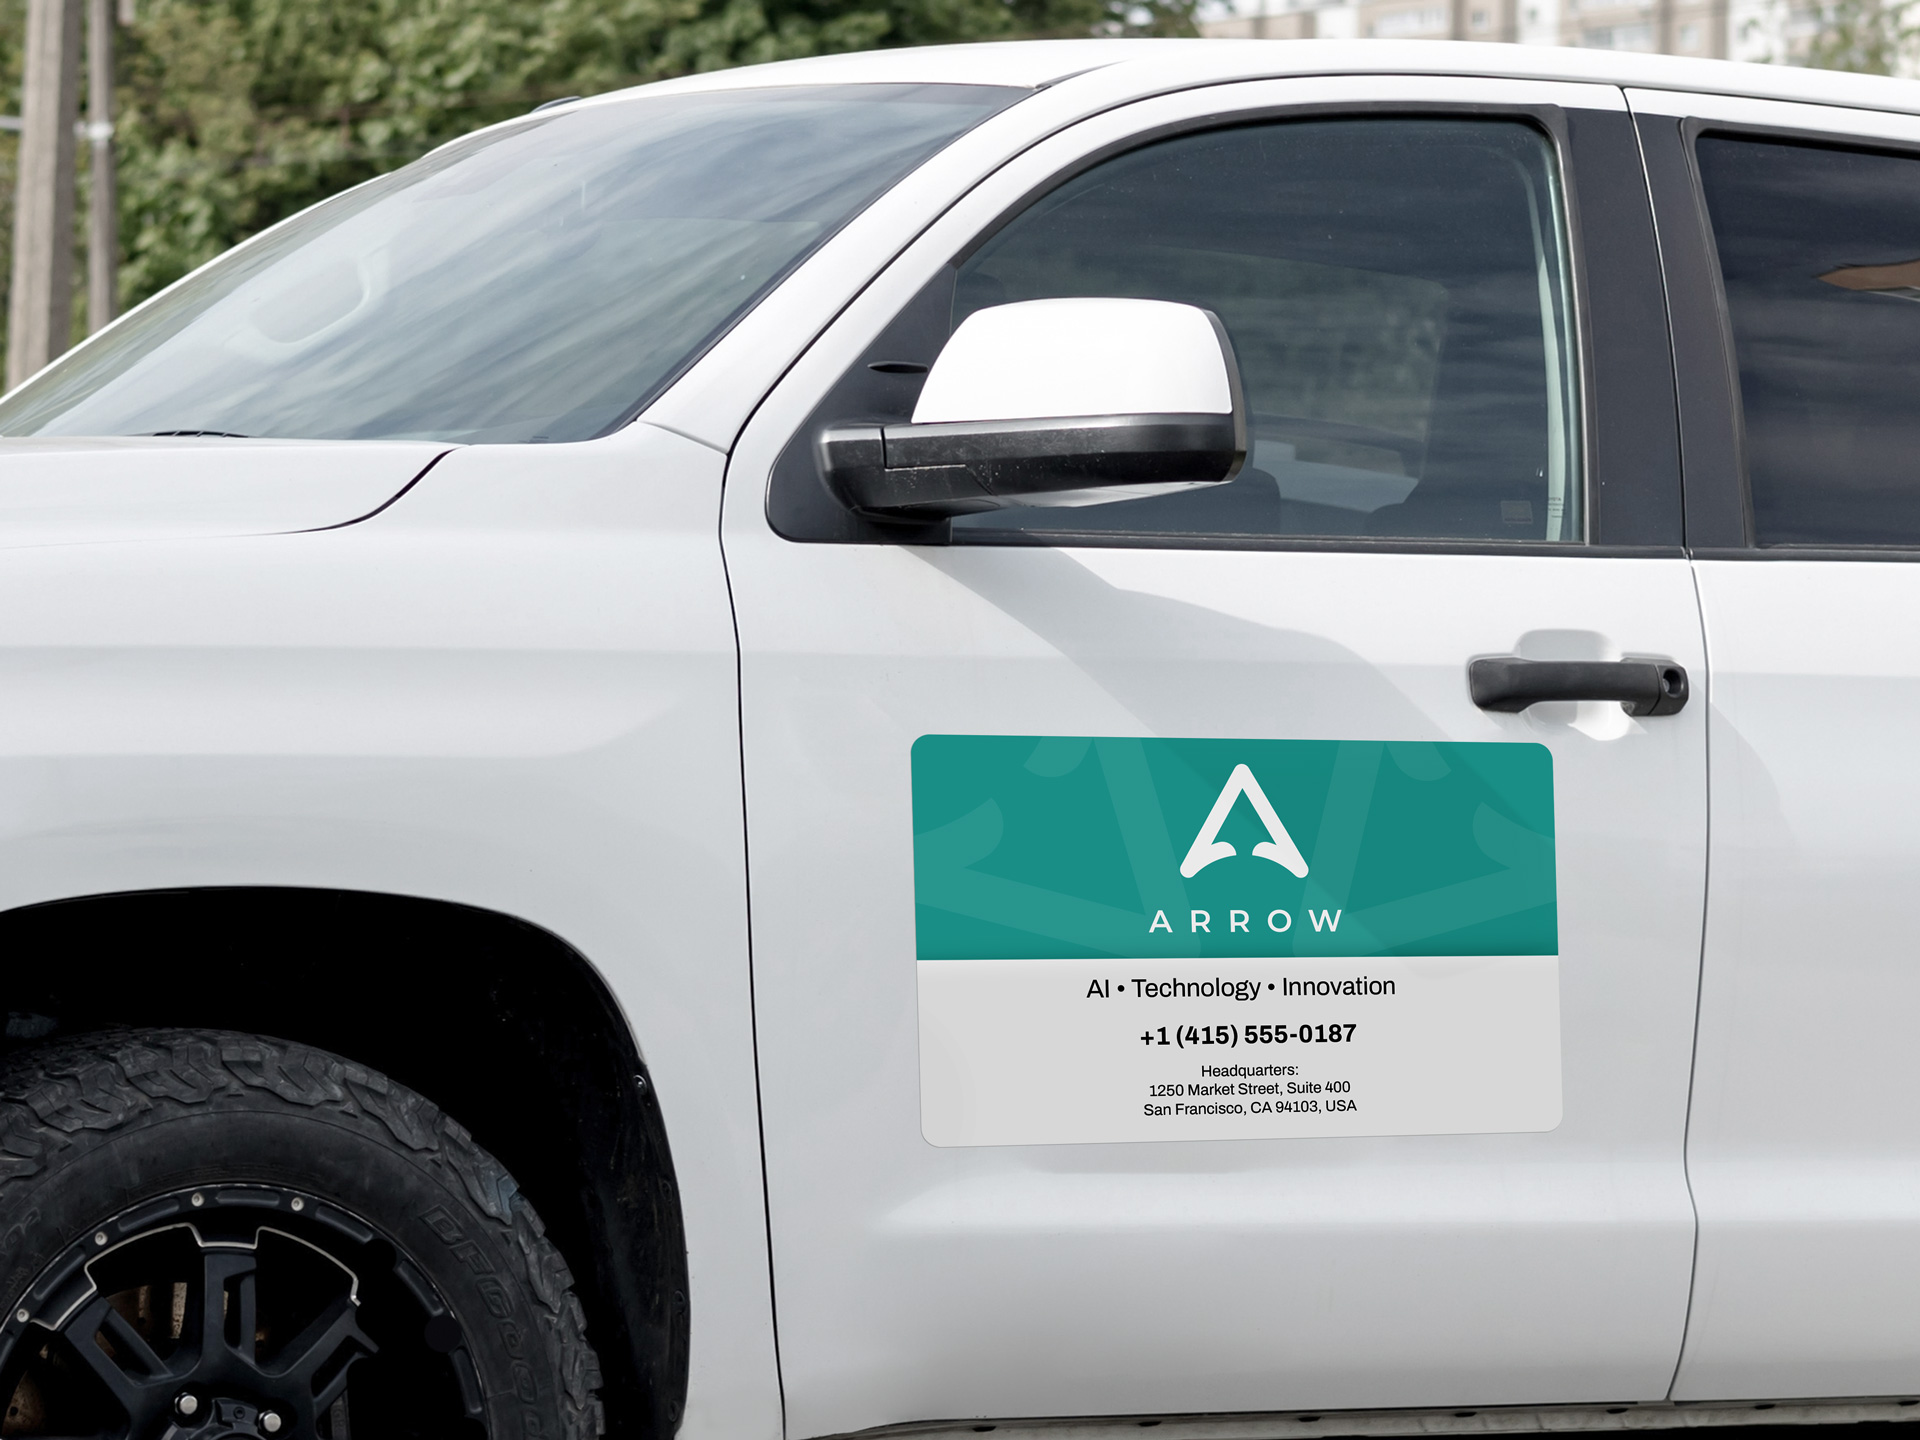
Business Advertising
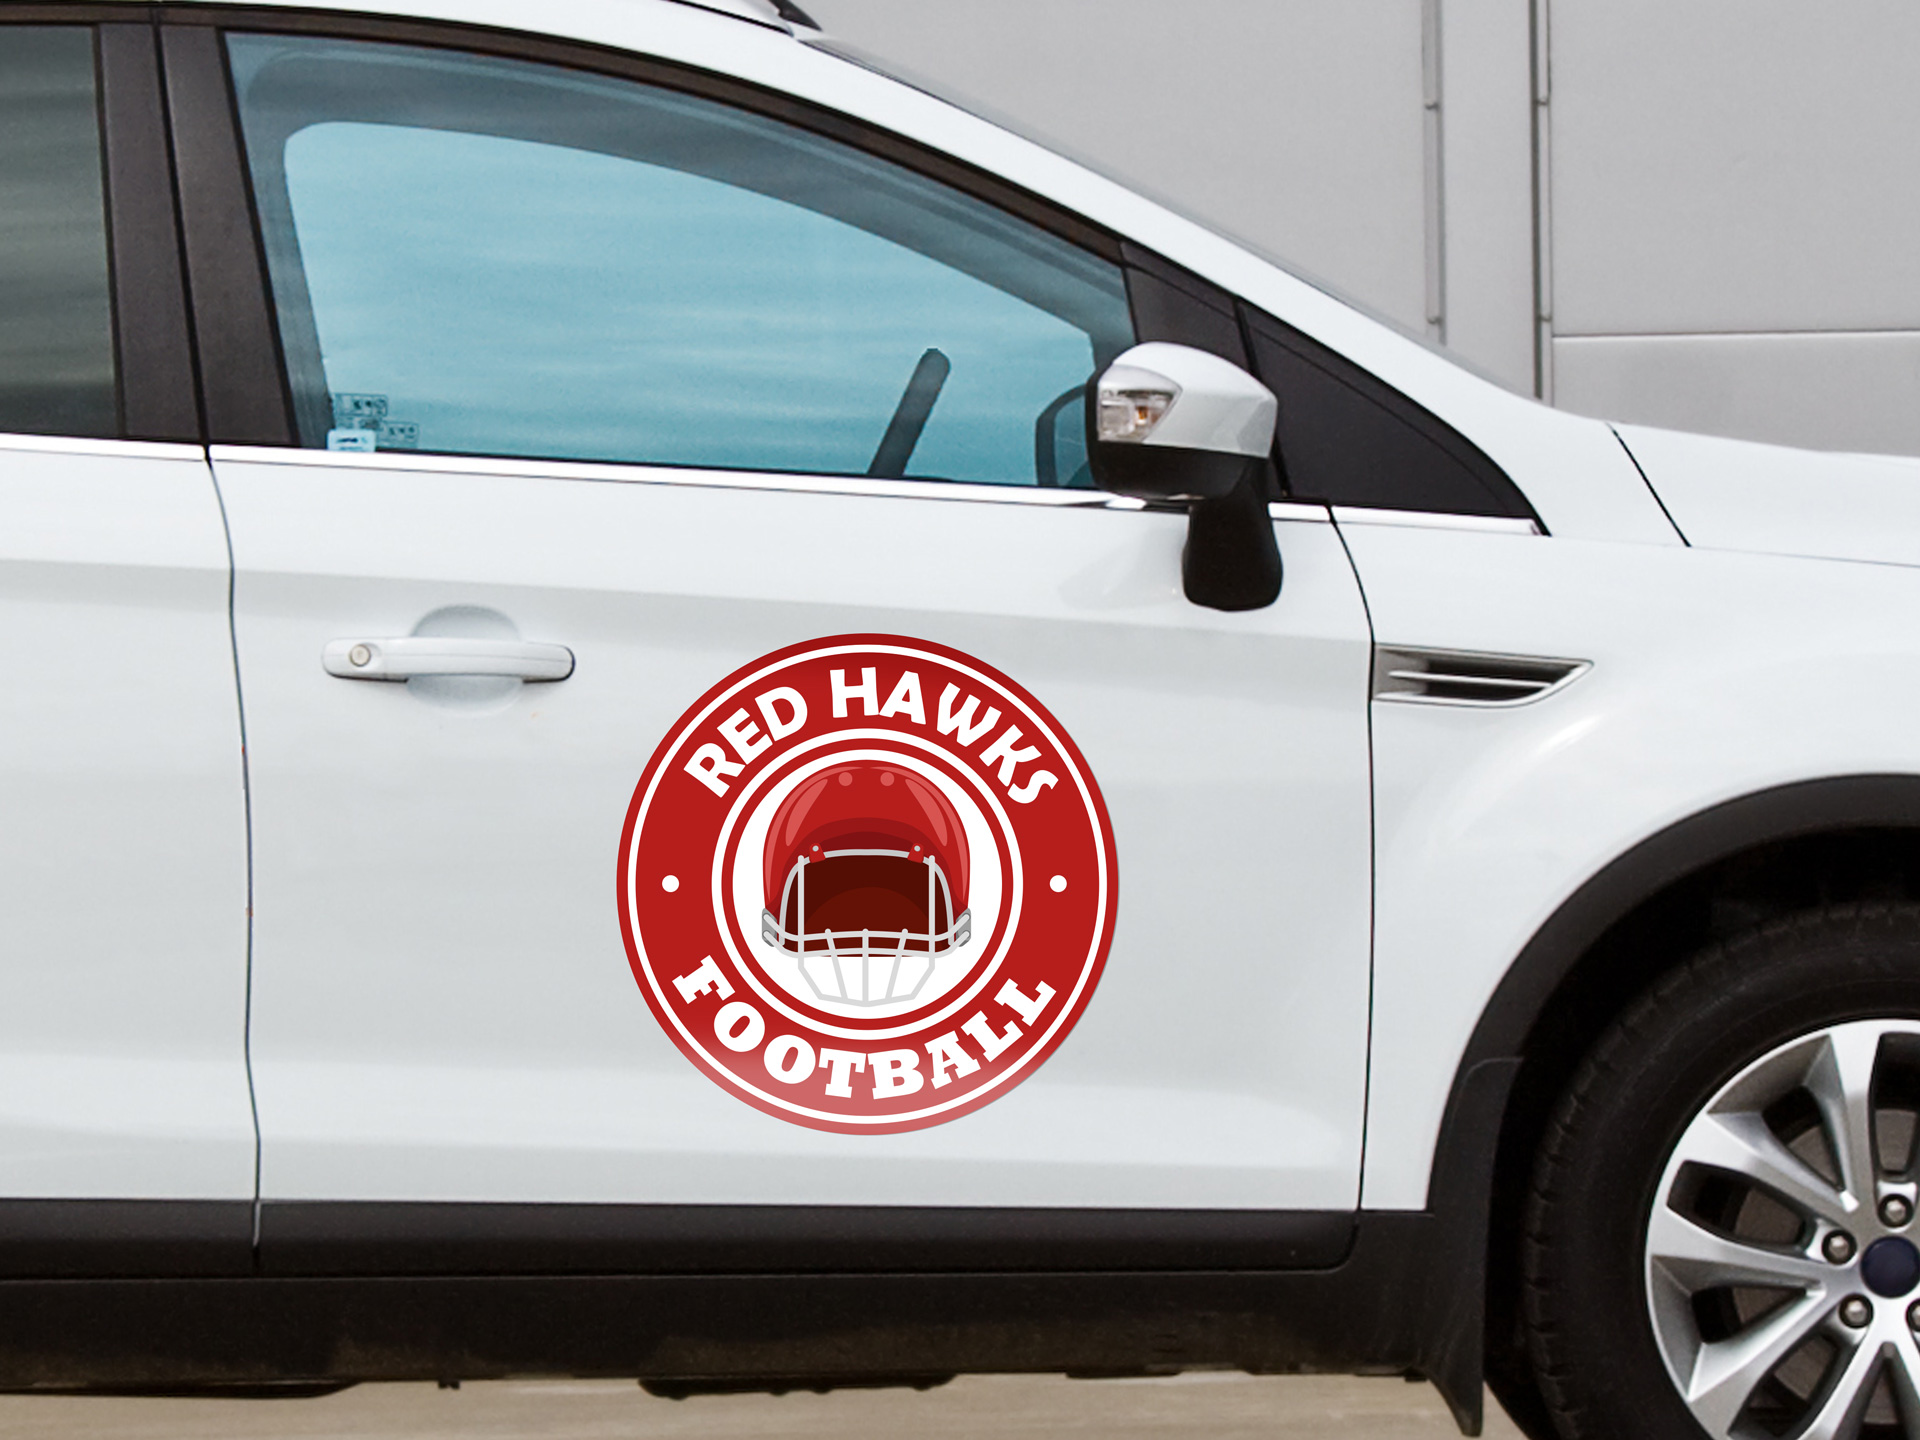
Team Support

Political Campaigns
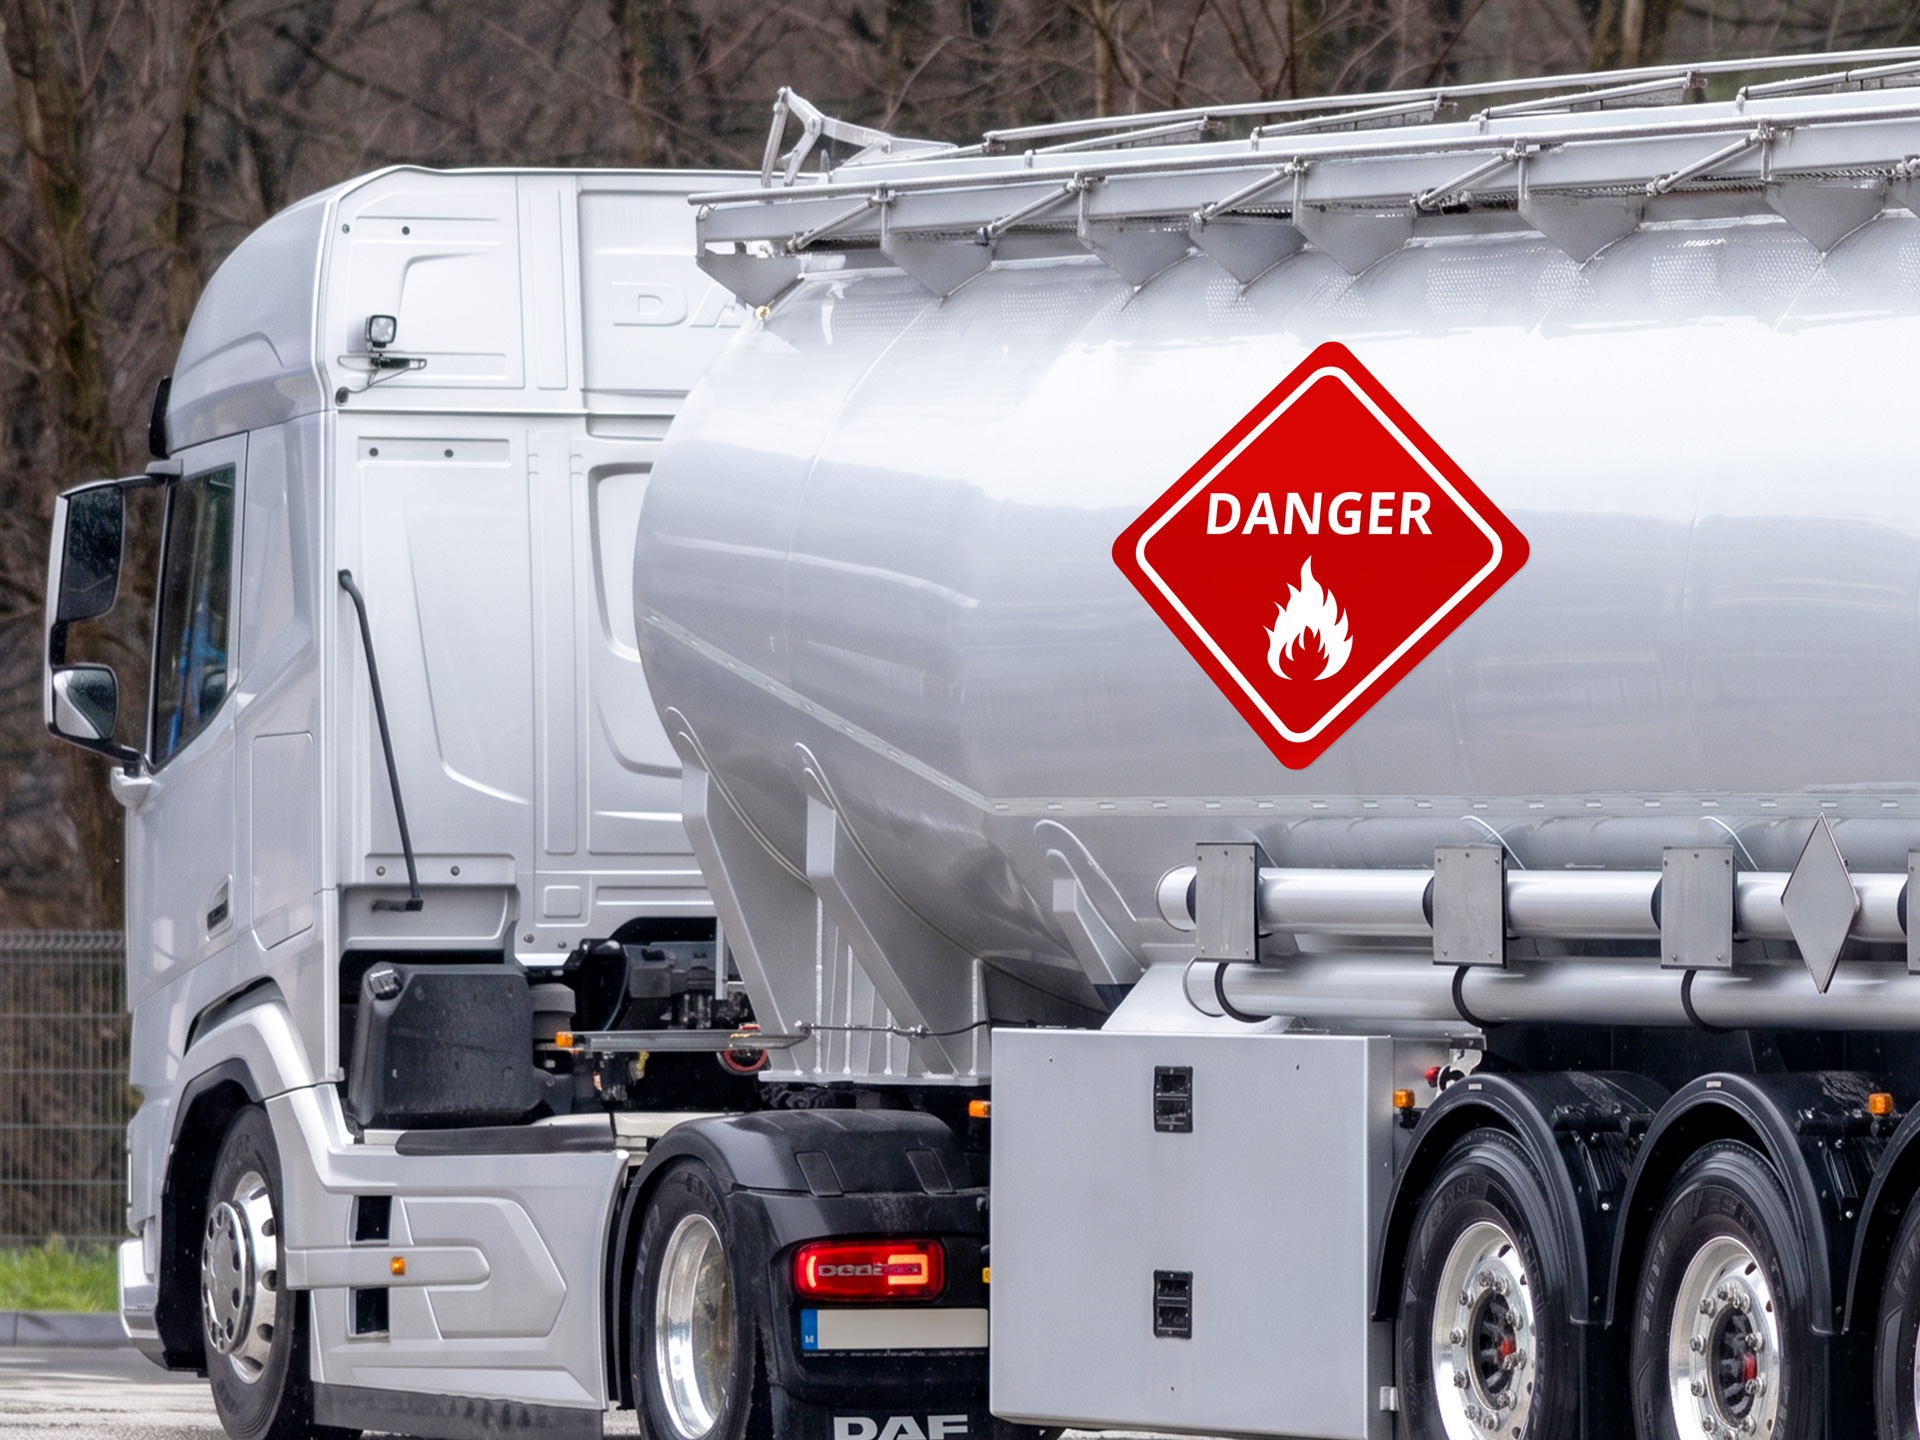
Safety Purposes
Placement Options for Vehicle Decals

Car Graphics for Bumpers

Vehicle Graphics for Doors

Car Graphics for Windows
Size Recommendations for Vinyl Car Decals
How to Install Custom Decals For Vehicles
Step 1: Wash the surface where you intend to apply your decal. Let it dry thoroughly.
Step 2: Use tape to temporarily position your decal and make sure it’s in its right spot.
Step 3: Peel away the back sheet from the bottom and pull it all the way off.
Step 4: Put the decal onto the surface. Once applied, you can't move it, so take your time.
Step 5: Press with your Squeegee to make sure all air gets out.
Step 6: Peel away the clear top sheet slowly. Pull at an angle. Press it back down if the decal lifts with it. Squeegee again and try to pull from a new angle.
Wet Installation
Step 1: Wash the application area and then wipe it down to remove any grime. Completely dry it with a paper towel.
Step 2: Position your decal with tape to make sure it’s level. Wet both the car surface and the sticky side of the decal with a soapy water mixture.
Step 3: Peel off the backing paper. Make sure the vinyl graphics stay attached to the clear transfer tape.
Step 4: Place the wet decal onto the wet surface. It will be slippery, allowing you to slide and adjust it into the position you want.
Step 5: Hold the decal steady. Use your Squeegee to press the water out from the center to the outer edges.
Step 6: Let it dry for 15-20 minutes and peel the clear transfer tape off at a sharp angle.
Step 7: Lay the tape back down in the area with your Squeegee if any letters or edges lift up.
Care for Custom Auto Decals
Store the vehicle indoors whenever possible. Use a cloth car cover to protect your graphics from the sun if a garage isn’t available.
Don’t let fuel spills, tree sap, or bird droppings sit on the graphic for any period of time. Avoid holding the nozzle of a pressure washer at an angle to the edge of the graphic. Hand-washing is the safest option.
Get Customized Designs For Your Car Decals
Products Related to Car Decals


FAQs
What is a car decal?
- A car decal is a vinyl sticker that’s primarily meant for application to vehicles. It’s used to boost business branding, advertising, or serve decorative purposes.
How to make my own car decal?
- Making your own car decal is easy with our free online design tool. Start by choosing your decal size and placement. Then upload your logo or artwork, add text with your business name and contact info, and pick your colors. You can also choose from our ready-made templates if you need design inspiration. Once you're happy with your design, just place your order, and we'll print and ship your custom decals ready to apply.
Can I design and order custom car decals in the colors I want?
- Yes! We offer full-color printing, so you can design your car decals in any colors you need.
Can I have my vehicle graphics cut into a custom shape?
- Absolutely! Our digital plotter machine can cut your decals into any custom shape you want. Choose from standard options like square, rectangle, or rounded corners, or go with an outline cut that follows the exact contour of your design. We can also add an overline cut with a thin border around your shape for extra contrast.
Where can I apply custom car decals?
- You can apply custom car decals to almost any part of your vehicle. The most popular spots are doors for business names and logos, windows for clear or perforated graphics, bumpers for slogans and contact info, hood decals for bold graphics or racing stripes, and trunks or tailgates for full-color designs.
Do car decals damage the application surface?
- No, car decals won't damage your vehicle's paint or surface when applied and removed properly.
What is the main difference between opaque and clear car decals?
- Opaque decals have a solid background that covers your vehicle's surface completely, while clear decals are transparent and let your vehicle's color show through.
Can I use car decals for business advertising?
- Yes! Car decals advertise your business wherever you drive or park. They're one of the most cost-effective marketing tools.
What info should I include in my business car decal?
- Include your business name, phone number, and website at a minimum. Add your logo for brand recognition and a short tagline that explains what you do.
What size should I choose if I need to print car decals for advertising?
- Go medium to large for advertising, such as 18" x 24" or bigger for doors, 6" x 24" or larger for bumpers.
Can I design and print large car decals?
- Yes! We print large decals up to 48" x 60" for hoods and tailgates, and 24" x 70" for rear windows. Perfect for full-coverage graphics and maximum visibility.
How thick are car graphics?
- Car graphics are typically 3-4 mils thick. They’re thin enough to look smooth on your vehicle but thick enough to be resilient.
How do I maintain car decals?
- Hand-wash the car decal with a soft cloth to keep it clean. To retain the sharp look of your custom car decals, avoid power washers and harsh chemicals.
How long do car decals last?
- Custom auto decals are the perfect tool for long-term advertising. With proper care and good weather conditions, images will retain their vivid look for many years.
Will the sun exposure damage my car door decal?
- You can be sure that our car decals withstand sun exposure. We use UV-resistant inks that are cured with UV rays during printing, so they’re fade-resistant even in direct sunlight.
Can I reapply the car sticker after removal?
- No, car decals are for one-time use only. Once you peel them off, the adhesive loses its strength and won't stick properly again. If you need a repositionable product, choose our car magnets.
Where do you ship custom car door decals?
- We deliver all our products to any location within the USA and Canada. Check our terms and policies page to see if this product qualifies for special offers or shipping discounts.
Are car decals and stickers the same?
- People sometimes use these terms interchangeably. But there are differences everyone should know before ordering. Car decals are larger and more professional products than stickers. They adhere to the car doors, panels, and windows to identify businesses and advertise their services. They can handle outdoor conditions for a long time.
Stickers are smaller prints serving more as personal expression rather than business branding. They are simpler in construction and do not always withstand weather shifts. Can decals be applied to newly painted cars?
- Yes, but you’ll need to wait for the paint to dry completely before applying your car decal. The waiting time depends on the paint quality. Some automotive paint experts recommend waiting for at least 30 days for factory-baked paint. They suggest waiting from 60 to 90 days for standard automotive repaints.
What surfaces can I apply my car decal stickers to?
- Smooth, non-porous surfaces are ideal for holding vehicle vinyl decals. Enamel-painted car metal, smooth plastic, and auto glass are on the list. It’s important to ensure a clean, grease-free surface before sticking them on. Avoid rough surfaces, such as brick, textured areas, or unpainted or rusted metal.
Do you offer lamination for the product? Which type should I choose?
- Yes, we offer glossy and matte lamination. Choose glossy lamination to get vibrant colors that pop from afar. Glossy lamination adds a shiny finish. It’ll make your graphics look sharp. It’s ideal for branding, advertising, and any design where visibility is a priority.
Choose matte lamination if you want a clean and professional look without the shine. Matte lamination reduces glare. This makes text easier to read under direct sunlight. It’s ideal if you need to print minimalist logos, political campaigns, and designs where readability matters more than visual impact. Can I order a squeegee to install custom auto decals?
- Yes, we offer the option of obtaining the Squegee. You need to choose this option while making your order via our design tool.
Is there a minimum order quantity for car decal printing?
- No, you can order as many graphics as you need.
How long will it take to get my car business decals?
- Car decals print in as little as one business day, with a fast turnaround time. The standard turnaround time takes two working days. Choose ground shipping for free delivery on orders over $99, or upgrade to express shipping if you need your decal sooner.
We also offer a pick-up option. You can take your product from our facility in Burbank, CA, once production is complete. Are these decals permanent or removable?
- These decals are long-term and removable. You cannot reuse them once you remove them from your vehicle.
What sizes do you offer for custom vinyl car decals?
- The size range of car decals varies from 6” x 6” to 58” x 1,680”. You can choose any size within this range to suit your specific needs.
Quality
Value for money
Reviewer Photos
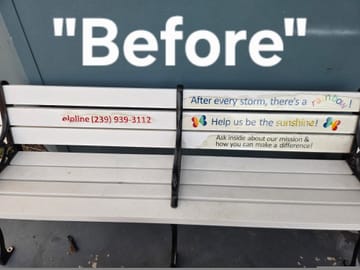
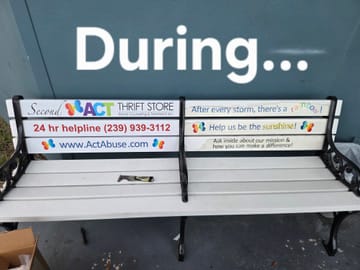
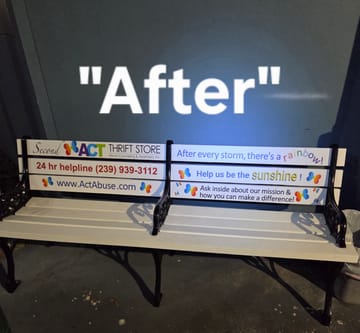


Easy to order, great quality, was not too hard to apply. I'm including before during and after pictures to illustrate my issue and how it was resolved. I chose to apply at dusk so it was getting dark when I left, but I wasn't there all that long. I just a volunteer here, but I like to help keep it nice looking ninja style. I hope it holds up, I will definitely order from this company again! Thanks yall!
All good except shipping cost.
wasnt what i was expecting
The final result was fabulous! Highly recommend!
We appreciate your positive feedback and your recommendation. Thank you!
It looked like junk on my car. The clear vinyl made every imperfection on my car stick out and it wouldn’t go on smooth. Ripped it off immediately, waste of money.
Thank you for your feedback. We’re sorry to hear the clear decal didn’t meet your expectations. The product was produced as ordered, but clear vinyl can highlight surface imperfections and requires a very smooth application area for best results. As discussed, we offered a solution to help make this right, and are waiting for your response. We’re happy to assist you whenever you reach out to us.
I appreciate that you were willing to give me a discount on the product that I should have purchased in the first place. However, when we spoke on the phone it was clear that these are known problems with the clear vinyl on vehicles, so you have lost my trust by selling them as a vinyl for your car, when that is probably not the best application. With that said, I would prefer not to give Square Signs more money.
I love it@
Thank you for trusting us with your signage needs.
The whole process was very easy and they delivered. I am very satisfied and I recommend this company.
Thank you for the awesome feedback. We're glad you had a smooth experience on our platform and we appreciate the recommendation!
Great product, service, and quality. Thanks!
Thank you for the awesome review. We're glad you liked the product.
I am still blown away because of the amazing job they did with my decal. They even made me a better quality version since I could not provide one myself, and even with that it still turned out great. I am for sure going to request more decals from these guys, and will recommend them to any who wants a decal done right. 10/10 Good job team
We can't find the words to thank you for the feedback, but we'll try. Thank you for taking the time to write us such an amazing review. We're glad our team could help you with the design, and we're so happy you loved the decals. They look amazing, and we're sure they're going to turn some heads. Thanks again, and we're already looking forward to your next order. Thank you for the recommendation as well.
Very helpful sales service. Fast, efficient and beautiful result. Couldn't have expected better.
Thank you for the awesome review. We're so happy to hear that you had a great all-round experience with us and that our product and service met your expectations. We look forward to working with you again soon!