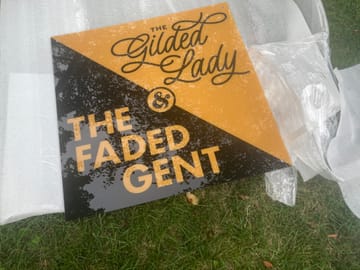
Refer a friend and get $50 when they make a purchase.

Refer a friend

10% OFF YOUR FIRST ORDER

FREE SHIPPING ON ORDERS OVER $85

Eligible for ground shipping within the contiguous US. Excludes products over 36”.

Refer a friend and get $50 when they make a purchase.

Refer a friend

10% OFF YOUR FIRST ORDER

FREE SHIPPING ON ORDERS OVER $85

Eligible for ground shipping within the contiguous US. Excludes products over 36”.

Refer a friend and get $50 when they make a purchase.

Refer a friend

10% OFF YOUR FIRST ORDER

FREE SHIPPING ON ORDERS OVER $85

Eligible for ground shipping within the contiguous US. Excludes products over 36”.

Black Acrylic Signs

A multipurpose, lightweight and aesthetically-pleasing medium. The product is sturdy, durable and applicable indoors and outdoors.
Standard Size:
Size:
Custom Size:

Price Total:

Installation Options for Black Acrylic Signs


We offer direct-mounting, hanging or free-standing installation options for black acrylic printing. The following installation accessories are available:

Installation With Standoffs

Get standoffs for a classy look. The method can be used for interior as well as exterior wall decoration. You’ll need a screwdriver, drill, anchors and the standoffs with all included parts. 

Please note that you should select the drilled holes and standoff options from the design tool before finalizing your order.

Step 1: Make sure the target surface is level and mark the points to drill 4 holes.

Step 2: Drill the holes and insert the anchors.

Step 3: Screw the barrels of the standoffs onto the anchors.

Step 4: Align the pre-drilled holes on the sign with the wall anchors.

Step 5: Slide them over the anchors and screw on the standoff caps.


Installation With Command Strips

Command strips are the best option for direct mounting without visible hardware.

Step 1: Make sure the surface is clean before application.

Step 2: Peel off the strip cover from one side and attach it to the sign.

Step 3: Peel off the second cover and apply the sign to the target surface.

Step 4: Grab the base of the sign and pull from below to detach it from the wall strips.

Step 5: Let the strips rest for at least an hour to firmly adhere to both surfaces.

Step 6: Apply the sign back to the surface by aligning and reattaching the strips.


Installation With Suction Cup & Hook

The suction cup and hook is an ideal option to hang your sign from glass or other smooth surfaces.

Step 1: Make sure the glass surface is clean of dust and debris.

Step 2: Stick suction cups to the surface by applying light pressure.

Step 3: Use the hook to hang the sign through pre-drilled holes.


Installation With Easel Backs

Choose easel backs to display small-sized custom signs on a table or countertop.

Step 1: Fold the wings of the easel backs to open the pre-dotted spots.

Step 2: Fold down the circular easel stabilizers and secure easel wings in their slots.

Step 3: Peel off the tapes from the adhesive parts of the easel backs.

Step 4: Fasten the easel backs on the front and back sides of the sign.

Step 5: To ensure they are secure, press and hold for a few seconds.

Top templates